Thursday, May 24, 2012

Keptosh Media

Keptosh Media logo
I am very proud to announce the name of my game development company:

Keptosh Media

Keptosh is a brand that I already control on the web. The original game is an enormous source of pride for me. This tribute to my beloved game and character just feels right.

I'm on vacation for the next few days and today I spent from 7AM until about 7:30PM designing and rebuilding Keptosh.com. So please take a look, it has been completely rebranded for Keptosh Media. You can also still find the original Keptosh game under projects.

Keep an eye on the Keptosh Twitter and Facebook accounts for possible updates. I will be spending some time cleaning them up and properly rebranding them over the course of the next few days.

Saturday, May 12, 2012

Portfolio


One of the biggest signs that a person is a web developer is that their site is either constantly changing or completely neglected. Rarely is it a stable or reliable place. I used to fall into the constantly changing category, but now I seem to have slipped into the neglected category. I find more and more that I need service and not a fully functional site. I get more out of twitter and blogger than I ever would have out of a custom site. I don’t need to worry about security updates or any type of general maintenance. The one area that I have been lacking in lately has been a portfolio section. I want a simple professional portfolio, but I don’t want to build or maintain one. Most of the web applications I have found are very focused on photographers and don’t seem to work for my purposes. Today I found carbonmade, a simple and effective portfolio hosting site. I have placed my portfolio on the site and I’m very happy with it. I have not dug deep yet, but the one glaring problem I see is no way to share the portfolio. I need a widget. I will make something custom and static, but it is unfortunate that they don’t offer anything. Considering the amount of time they are saving me though, I won’t complain too much.

Wednesday, May 9, 2012

Naming Things

I think I have found a name for the company. I'm going to let it settle for a few days to make sure it is what I want. I will probably try to get it registered next week, depending on how difficult the actual process is. It has been surprising difficult to come up with something. Considering that I name fake companies, people, planets, and various things in stories all of the time, I felt like this should have been an easy process. I had considered a contest or asking friends but in the end I decided it was much too personal for that. This is something that is going to be with me for the rest of my life.

Monday, May 7, 2012

The Cross Platform Problem


One of those problems I have struggled with desperately over the last several years is the platform problem. When I made Keptosh, I built it with AGS. This made sense at the time. AGS is a Windows only Adventure Game engine. Work is currently underway to change this and over the years many different versions have surfaced that allow users to play under Linux or OSX. However, this support has not kept pace very well with the main engine and it has left behind things like plugins. Back in 2003 though, it didn’t matter. No one played games on anything but consoles and Windows PCs. The idea of an amateur game on a console at that time was a bit of joke, as there was hardware involved and fees that ranged into the tens of thousands of dollars. The big three didn’t really want anything to do with having amateur gaming on their consoles. 

Today though, it is a different story. Nintendo, Microsoft, and Sony have all built platforms for amateur game distribution into their consoles. More and more games are being released for OSX and since then Macs are in nearly four times as many homes. Not to mention the mobile revolution. So, we now need to target between up to seven platforms right out the gate when building a game. Windows, OSX, iOS, Android, Wii, Xbox 360, and the PS3 all dominate the gaming market simultaneously right now. Those seven even make up a conservative estimate. Many amateur games are releasing with Linux versions and some developers are beginning to target Nintendo and Sony handheld systems early on. For the amateur developer this is a massive undertaking if you build natively. It is generally impractical for a single developer to tackle this alone. 

This is where engines like Unity 3D come in. Unity supports multiple platforms right from the start. It is an amazing piece of software. The editor is available on both Windows and OSX and the learning curve for the doing basics in the editor is not incredibly steep. A large community is available to help you through the more complex aspects of the engine. The one glaring problem for Unity 3D for me though is that pesky 3D part. I like my pixel art. I have been on the lookout for a 2D editor that accomplishes the same tasks. So far all I have found is Stencyl Works. Unfortunately, all they target are iOS and Flash. Android and HTML5 are still in the works for the engine. There are several alternatives ways to use Unity, a 2D Toolkit exists. I have also created a AGI styled 3D model in Blender which shows some promise. There is also the Minecraft approach to graphics in an engine like Unity. It seems that this is the most likely road for me to travel down for the time being. In the future I am hopeful that new engines will arrive that allow cross platform 2D development. I think the real challenge here for the engine developers is continuing to support all of those different platforms. The fact that Unity is such a performance champ on all platforms it runs on says a lot about the engine too. Plenty of tools exists to create simplistic apps on Android and iOS, but they sacrifice performance for their cross platform abilities. Not to mention that these platforms rarely tackle anything but mobile and flash. For now, it seems that Unity 3D is my primary engine of choice. It’s not so bad to be in a position where you are faced with an engine that is overpowered for your tasks. 

Sunday, June 19, 2011

The Combat RPG - iPhone project - Dice class


I started working on my first Objective-C project this weekend. I spent most of the week watching videos on Lynda.com by Simon Allardice covering the basics of iPhone development. The goal is to eventually build 
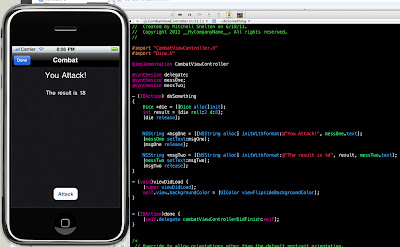
VoidTrader on the iPhone/iPad. For now though, I'm going to build a small RPG fighting game. I have a few iterations planned, which I may put up in a different post. Below is an example of the Dice class I created. This initial iteration served a couple of goals. First, I built a main screen, about screen, and combat screen. This allowed me to get comfortable with adding different views. Next the Dice class itself allowed me to practice building and using a custom class.


Obviously, I intend on adding a lot more to that screen. I would like to do some custom graphics and perhaps animations. However, that will have to wait for several iterations.

The Dice class:

//
//  Dice.m
//  CombatRPG
//
//  Created by Mitchell Shelton on 6/18/11.
//  Copyright 2011 MitchellShelton.com. All rights reserved.
//
#import "Dice.h"

@implementation Dice

/*
 * A Dice simulator method
 * @numDie
 * The number of dice being rolled
 * @sides
 * The number of sides on the dice
 */
- (int)roll :(int)numDie d:(int)sides {
  
 // Handle incorrect dice or sides
 if (numDie == 0) { // Is the quantity zero?
  // There must be at least one die
  numDie = 1;
 } 
 if (sides == 0 || sides == 1) { // Are the sides zero or one?
  // Any die must have at least two sides
  sides = 2;
 }
 
 // Initialize our return value
 int result = 0;
 
 // Loop over the die rolls
 for (int i=0; i < numDie; i++) {  
  // Roll the die  
  int rollResult = (arc4random() % sides) + 1;
  
  // Add the die roll to our total result
  result = result + rollResult;  
 }
 
 // Return the result of our roll
 return result; 
}

@end

Calling the method:
Dice *die = [[Dice alloc]init];
int result = [die roll:2 d:8];
[die release];

So, why a dice class?

I'm basing the RPG "engine" on some modified Dungeons and Dragons rules for combat, encounters, and general mechanics. So there will be initiative rolls, weapons will do damage based on rolls, etc. I already wrote classes for the dice, players, armor, and weapons in PHP. I also have all of the stats for experience points, a few default weapons types, and miscellaneous other data that will be kept in a database.

So what is next?

I'm going to get that data from a remote MySQL database into my iPhone app. This will come via a web service eventually, but for now it will most likely come from flat xml files. That will allow me to focus on the iPhone end of programming, and not on figuring out the web service part. Eventually, I will need the web service to be writable though so I can allow users to upload profiles to a connected web site.

-Mitchell

Monday, April 25, 2011

Tilt Shift Photography

I have wanted to try the tilt shift trick in Photoshop for a while now. I took this photograph in San Francisco in 2010 and thought it would be a great candidate. I'm really happy with the results.


http://www.tiltshiftphotography.net/photoshop-tutorial.php

later,
-Mitchell

Sunday, April 24, 2011

NetBeans - Java Database Connection Tutorial

/*
 * This console application demonstrates a basic database connection.
 *
 * NetBeans Database Connection Tutorial
 *
 *       - Completed with NetBeans 6.9.1 on Microsoft Windows 7
 *
 *       - When you see a -> in this tutorial it is typically instructing
 *       you to open a menu/submenu
 *
 *       - I try not to assume too much about the reader, but you should
 *       already be comfortable with some Java basics and maybe even SQL.
 *       I reference several tutorial resources throughout this tutorial
 *       that can get you started.
 *
 *
 * Finding a tutorial that simply explained connecting to a database
 * was beginning to seem impossible. In the end I never did find a
 * rock solid tutorial. This is a collection of the bits and pieces I
 * was able to piece together from around the web. Hopefully it will help
 * others who are trying to accomplish a seemingly simple task.
 *
 * A little background about me and this tutorial. I would like to point out
 * that this is simple, dead simple. It might not be useful to many. A vast
 * majority of the tutorials that I felt "blocked my way" were full on CRUD
 * interfaces. So the connection took backseat to creating that interface. I
 * suspect that creating the CRUD interface is what more people really want
 * to do. So demand has dictated that those tutorials dominate search results.
 * This is the 2nd thing I have written in Java outside of one college class
 * on Java about 10 years ago and the video tutorials on
 * http://www.javavideotutes.com/. The first thing I wrote, more like clicked
 * buttons, was just a silly swing calculator tutorial on the NetBeans site
 * (http://netbeans.org/kb/docs/java/gui-functionality.html). So, why this?
 * Why not move onto a CRUD interface? Because I'm a web developer. I think
 * in databases. I think of that as the centerpiece of any web application. So,
 * I attacked that problem first. This tutorial is the result.
 *
 * Open up NetBeans and let's get started.
 *
 * Step One: Create the project
 *
 * File -> New Project -> Categories: Java | Projects: Java Application
 *
 * Click "Next"
 *
 * Enter the name of your project and where you would like to save it. I left
 * the other fields untouched. On my system all of the checkboxes were checked
 * by default.
 *
 * You now have a very simple Java Application ready to go.
 *
 * Step Two: Add the database
 *
 * What follows are a few quick and dirty steps to creating a database, tables,
 * and data in Netbeans. If you would like to explore this topic further I
 * recommend you visit the NetBeans tutorial on database interaction here:
 * http://netbeans.org/kb/docs/ide/java-db.html
 *
 * If you don't have a sidebar with a services tab you can go to
 * Window -> Services
 *
 * You should now see the Services window. We are after the Service called
 * Java DB under Databases. So go to Databases -> Java DB, now right click and
 * select "Create Database..."
 *
 * Enter a name for your database, the username and password to access your
 * database. Go to properties and take note of the Java DB Installation path.
 * Mine was:
 *
 * "C:\Program Files\glassfish-3.0.1\javadb"
 *
 * Now click "Cancel" to go back to the database setup dialog and double
 * check the info you entered for your database. Don't forget your password,
 * I'm not sure if there is an easy way to recover it. Now click "Ok". If you
 * already clicked okay before getting the path you can just right click on the
 * Java DB icon and go to properties to see the path again.
 *
 * Below Java DB you should now see the database you created. It will look
 * something like this:
 *
 * jdbc:derby://localhost:1527/your_database_name [your_name on your_name]
 *
 * Right click on that icon and select "Connect..."
 *
 * If you encounter connection errors in your code double check this. I
 * restarted NetBeans in the middle of writing this code and discovered that
 * I had to manually reconnect.
 *
 * Step Three: Create the Tables
 *
 * If you expand the tree for your new database you should multiple entries.
 *
 * We are only concerned about the "APP" entry. Expand "APP", you should now
 * see three folders labeled "Tables", "Views", and "Procedures", we will be
 * focusing on the Tables folder.
 *
 * Note: If you can not expand the database
 * information you are most likely not connected. This should be indicated by
 * a "broken" icon next to your database name.
 *
 * Right click on the "Tables" folder and select "Create Table..."
 *
 * This should bring up a dialog box where you can create your table. Do so by
 * giving it a name. I called mine "users". If you change the name of the table
 * you will need to change the code to reflect that change.
 *
 * Now add some columns. I created two columns. One called "id" and another
 * called "name". They were configured as follows:
 *
 * id:
 *
 * Name: id
 * Type: NUMERIC
 * Size: 16
 * Checked "Primary Key"
 * Checked "Index"
 *
 * name:
 *
 * Name: name
 * Type: VARCHAR
 * Size: 255
 *
 * Once our Table and Columns are created we need to add data to them.
 *
 * Right click on our new table and select "View Data..."
 *
 * Two things happen here. One, you have just automatically created the query
 * you are going to use in your app. Two, you should have a table with a
 * "Insert Records" icon on it.
 *
 * First, the query:
 *
 * If you named your table users then it should be as follows:
 *
 * select * from APP.USERS
 *
 * You will notice that in the code mine is this:
 *
 * SELECT name FROM app.users
 *
 * In web development using the "*" selector is considered bad practice. I
 * imagine this is the same for Java development. So I replaced it with the
 * column I wanted to display ("name"). I also changed the case to reflect
 * what I commonly see in SQL queries. All SQL commands are all caps, while
 * other content is in lower case. It will work either way, these are more my
 * personal preferences.
 *
 * If you are not comfortable with SQL this is a decent way to generate your
 * query until you get up to speed. If you changed the table name or create
 * different columns you will want to keep this method in mind.
 *
 * Second, the table:
 *
 * There are lots of options here, but all we are concerned with is adding a
 * record or two. So click the "Insert Records" icon.
 *
 * This will bring up a dialog where we can start entering in some data. I
 * created two records. You will need to manually number your records here. SQL
 * GUI's I have dealt with in the past have always auto-incremented your
 * primary key for you. This one does not do this via the GUI.
 *
 * I entered the following:
 *
 * id: 1
 * name: bob
 *
 * id: 2
 * name: fred
 *
 * Step Four: Adding the database to your project
 *
 * This was tricky to figure out. Your database will not work without it.
 * What you are doing here is giving your project access to the database
 * drivers.
 *
 * Go to your "Projects" tab or click Window -> Projects
 *
 * Right click on your project and select "Properties"
 *
 * A dialog box will pop up. Go to Categories: Libraries. Now under the
 * "Compile" tab click the "Add JAR/Folder" button. Remember that "Java DB
 * Installation path" we talked about earlier? Navigate to there from the file
 * browser that pops up.
 *
 * go into the "lib" folder and select the file called "derbyclient.jar"
 *
 * Step 5: The code (finally!)
 *
 * Everything you need is below. I have commented the code as best as my
 * limited knowledge of Java will allow me.
 *
 * There are a few things about this code that I would like to cover.
 *
 * The driver name: I am getting the driver name through some most likely
 * unnecessary code -
 *
 * Driver driverClass = (Driver) DriverManager.getDriver(db_loc);
 * String db_driver = driverClass.getClass().getName();
 *
 * You could alternative manually assign the value to the db_driver String.
 *
 * for example:
 *
 * String db_driver = "org.apache.derby.jdbc.ClientDriver";
 *
 * What my complex code is doing is grabbing the name of the driver based on
 * the URL of our database. I thought it was some handy code for trouble
 * shooting. It led me to realize that my project did not have access to the
 * database. So I left it in.
 *
 * Imports:
 *
 * I saw a lot of tutorials that listed the SQL import as:
 *
 * import java.sql.*;
 *
 * I applied the SQL "*" SELECT opinions here. Why import all of that code if
 * you aren't going to use it? Granted, this could cause problems while
 * learning. You may attempt to use some code from another tutorial and not
 * understand why it isn't working. A lack of an imported class might be the
 * reason!
 *
 * Displaying results:
 *
 * This is the next challenge for myself. The method I'm using here is pretty
 * simple. It loops over the result set and displays results from a particular
 * column. My challenge now is to learn all of the ways that you can deal with
 * that result set in Java. My instinct is to get it all into an array so I can
 * just manipulate that. We will see where that leads me.
 *
 * Conclusion:
 *
 * I hope you have enjoyed this tutorial and found it useful.
 *
 * If you are new to Java or any language, please, write Tutorials! You may
 * think you don't know enough or don't have anything to contribute, but keep
 * in mind, you are bringing a fresh perspective to even the veteran users. My
 * opinion, especially in the case of this tutorial, is that if no one else is
 * doing it, you should. So, even if my way, or your way, is the "wrong" way,
 * at least it works.
 *
 * A note to all tutorial writers out there: This is a "Working Tutorial"
 * Please, don't write non-working tutorials. When your tutorial has the words
 * "You can figure out that part", you are missing the point. No, we can't, or
 * we wouldn't be reading your tutorial!
 *
 * I apologize for any grammar mistakes, spelling errors, coding nightmares, or
 * Java good practices that I have violated during the course of this tutorial.
 * Please leave comments if this tutorial is in a blog/forum or email me at
 * info@mitchellshelton.com if you have questions or suggestions.
 *
 * Thank you,
 * -Mitchell
 *
 */

// Define our package
package databasetest;

// Import libraries
import java.io.IOException;
import java.sql.Driver;
import java.sql.DriverManager;
import java.sql.Statement;
import java.sql.Connection;
import java.sql.ResultSet;

/**
 * @author Mitchell Shelton
 */
public class Main {

    /**
     * @param args the command line arguments
     */
    public static void main(String[] args) throws IOException {
        // Display a message to wrap around our test
        System.out.println("Testing some SQL!");

        // Set variables to hold our database information
        /*
         * db_loc: The URL that points to our database. In NetBeans (6.9.1)
         * this can be found by going to services -> right click on database ->
         * properties
         *
         * db_user & db_pass: credentials to access the database that would have
         * been entered when the database was created
         *
         * db_query: The SQL query we are testing
         *
         */
        String db_loc = "jdbc:derby://localhost:1527/testdatabase";
        String db_user = "test";
        String db_pass = "test";
        String db_query = "SELECT name FROM app.users";

        // The database connection must be in a catch/try
        try {
            // Find the driver based on the database URL
            Driver driverClass = (Driver) DriverManager.getDriver(db_loc);
            String db_driver = driverClass.getClass().getName();

            // Connect to the database
            Class.forName(db_driver).newInstance();
            Connection c = DriverManager.getConnection(db_loc, db_user, db_pass);

            // Run our SQL query
            Statement sql = c.createStatement();
            ResultSet rs = sql.executeQuery(db_query);

            // Display our results
            while (rs.next()) {
                String lastName = rs.getString("name");
                System.out.println(lastName + "\n");
            }

            // Display a confirmation message that our test worked,
            // catch should trigger before this is displayed if there
            // is a problem.
            System.out.println("Connection Successful");
        } catch(Exception e) {
            // Display our error message
            System.out.println("The following exception occurred:");
            System.out.println(e.getMessage());
        }

        // Close our output wrapper message
        System.out.println("Done Testing SQL!.");
    } // end public static void main

} // end public class Main